
Modern live performance in electronic and pop worlds all start with the stems from a record. You can learn everything about a track and what’s important in it from the stems. When recreating parts for performance you reference the stems. When adding BVs to playback you reference the stems. When wondering what key the song is in you go back to the stems. Suprisingly, however, they’re often overlooked and mismanaged to the point that it’s difficult to understand what audio is for what song and the mix is all over the place. Good stem management will help you focus on way more important things like does the show look and sound good rather than asking…
What the fuck is kick2.wav for?
A big thanks to Modern Tales for letting me reference our work on their track Wide Awake for this article. Take a listen to it here.
The Basics
Stem management is super important. There’s nothing worse than staring at a show file where every bass stem is called Bass.wav and every backing vocal stem is called BV.aif. When working on an individual track in a production capacity this isn’t really an issue. You only have 1 song to worry about and realistically that 1 song can change at any time. The creative isn’t finished yet and it should remain as chaotic as it needs to until the best possible song is complete. Unfortunately live world is much more functional. The song is finished. Your fans love it. They just paid £15 to come see you play it.
There isn’t really any hard and fast rules to keep to when naming and managing stems. It’s more of a series of guidelines that will help keep your audio from getting completely lost amongst other audio. Names will vary from Artist to Artist and Producer to Producer depending on genre and production style but making sure you’re clear and consistent is key. Here’s 3 ways you can go about that and start developing your own systems for your stem management.
- Use an appropriate name for what’s in the audio file. Sounds obvious but here’s a screenshot of some real stems we’ve worked with before…
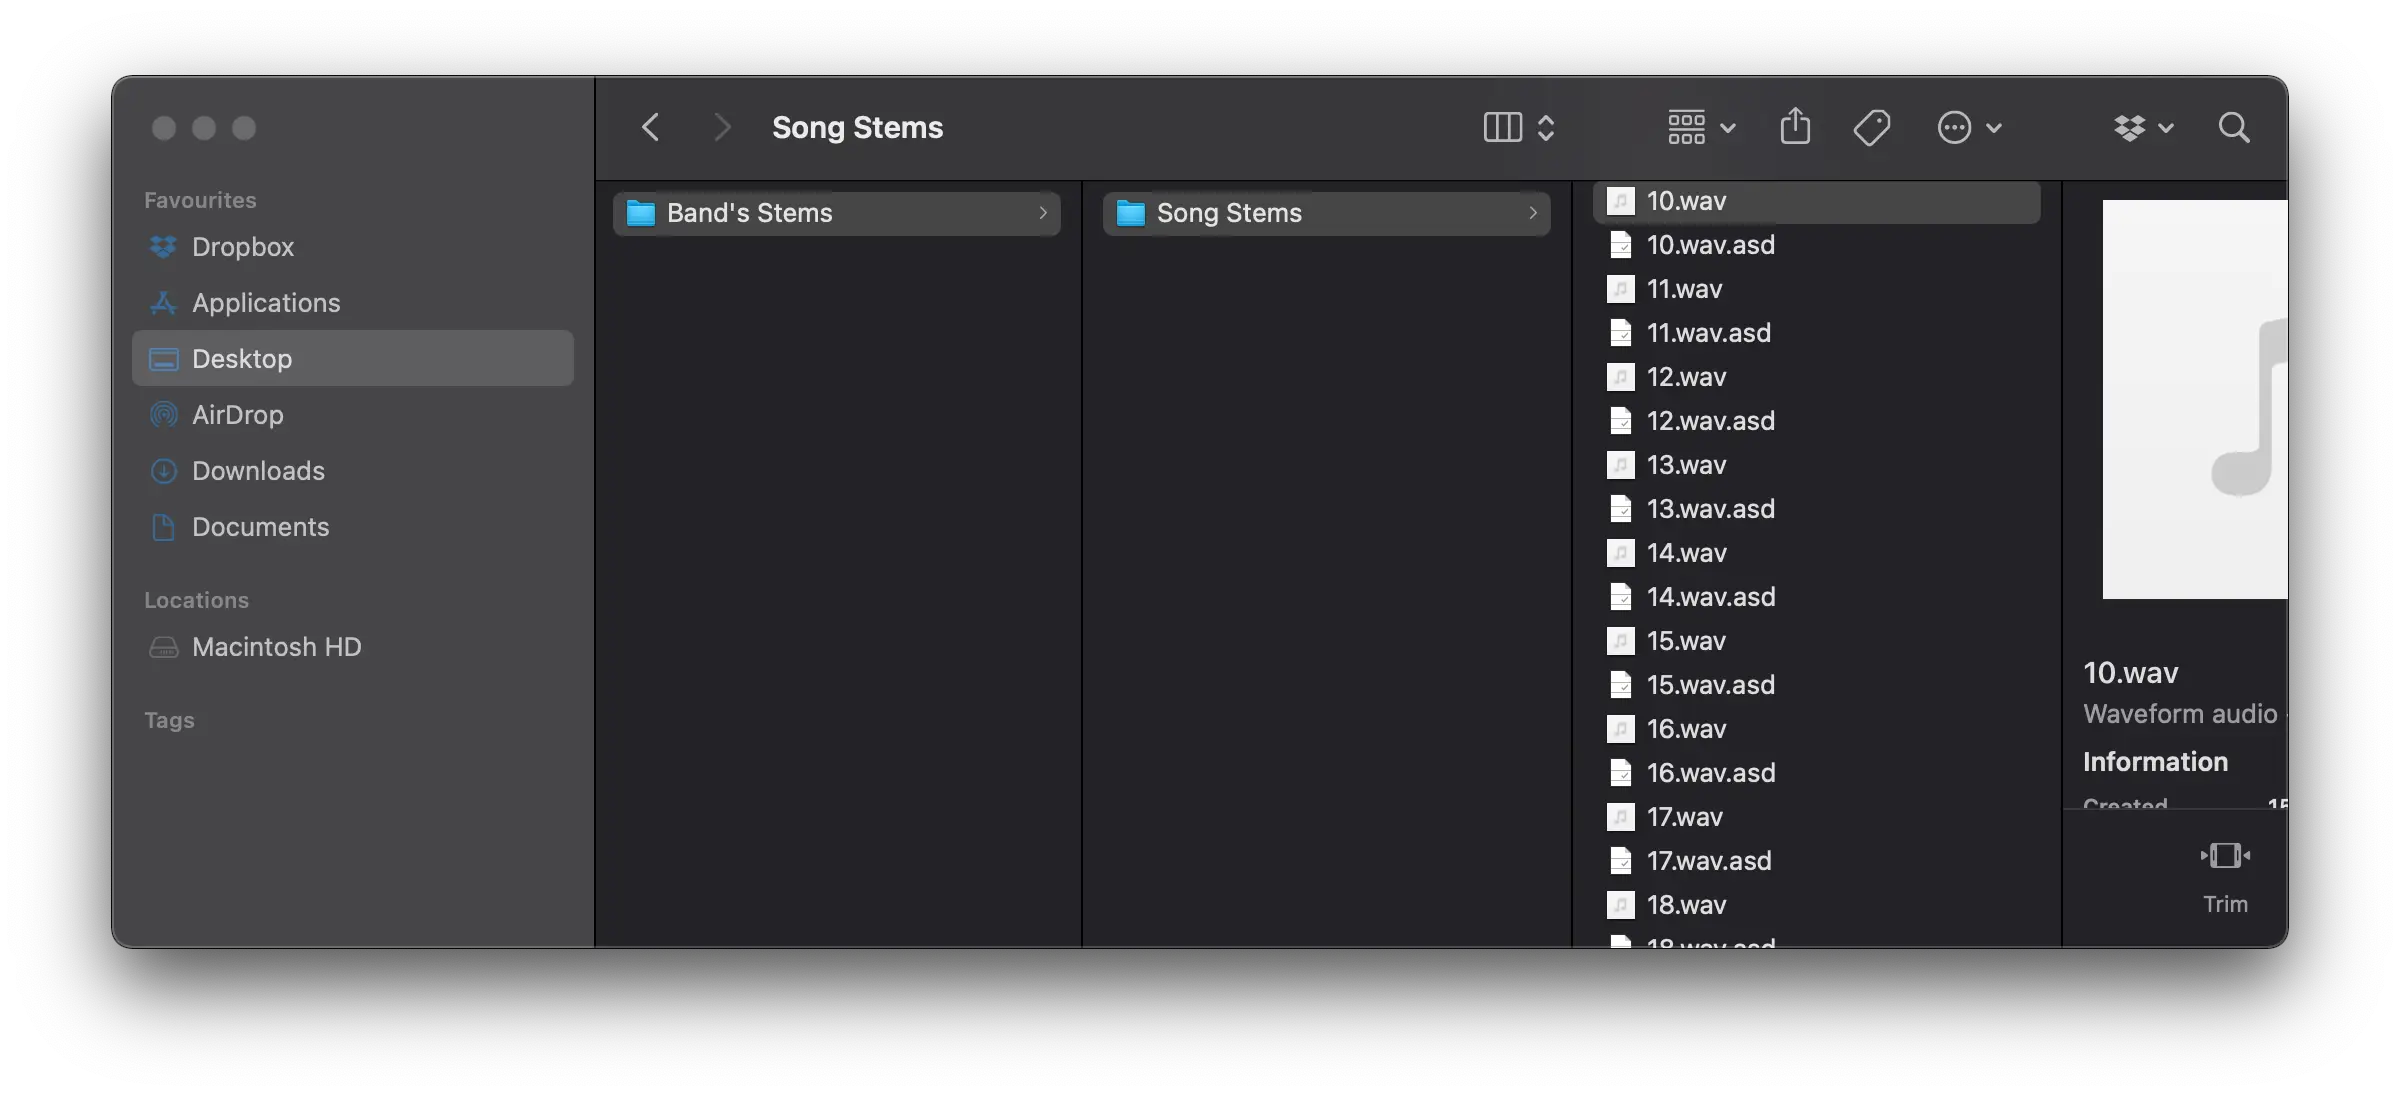 Things like your Kick should be called
 Kick.wav, an ethereal pad should be calledEthereal Pad.wav. The stem name should give anybody looking through it a good idea of what the sound is and where it fits in your track straight away. - Add your song name to the stem. Even just an abbreviation. This turns our
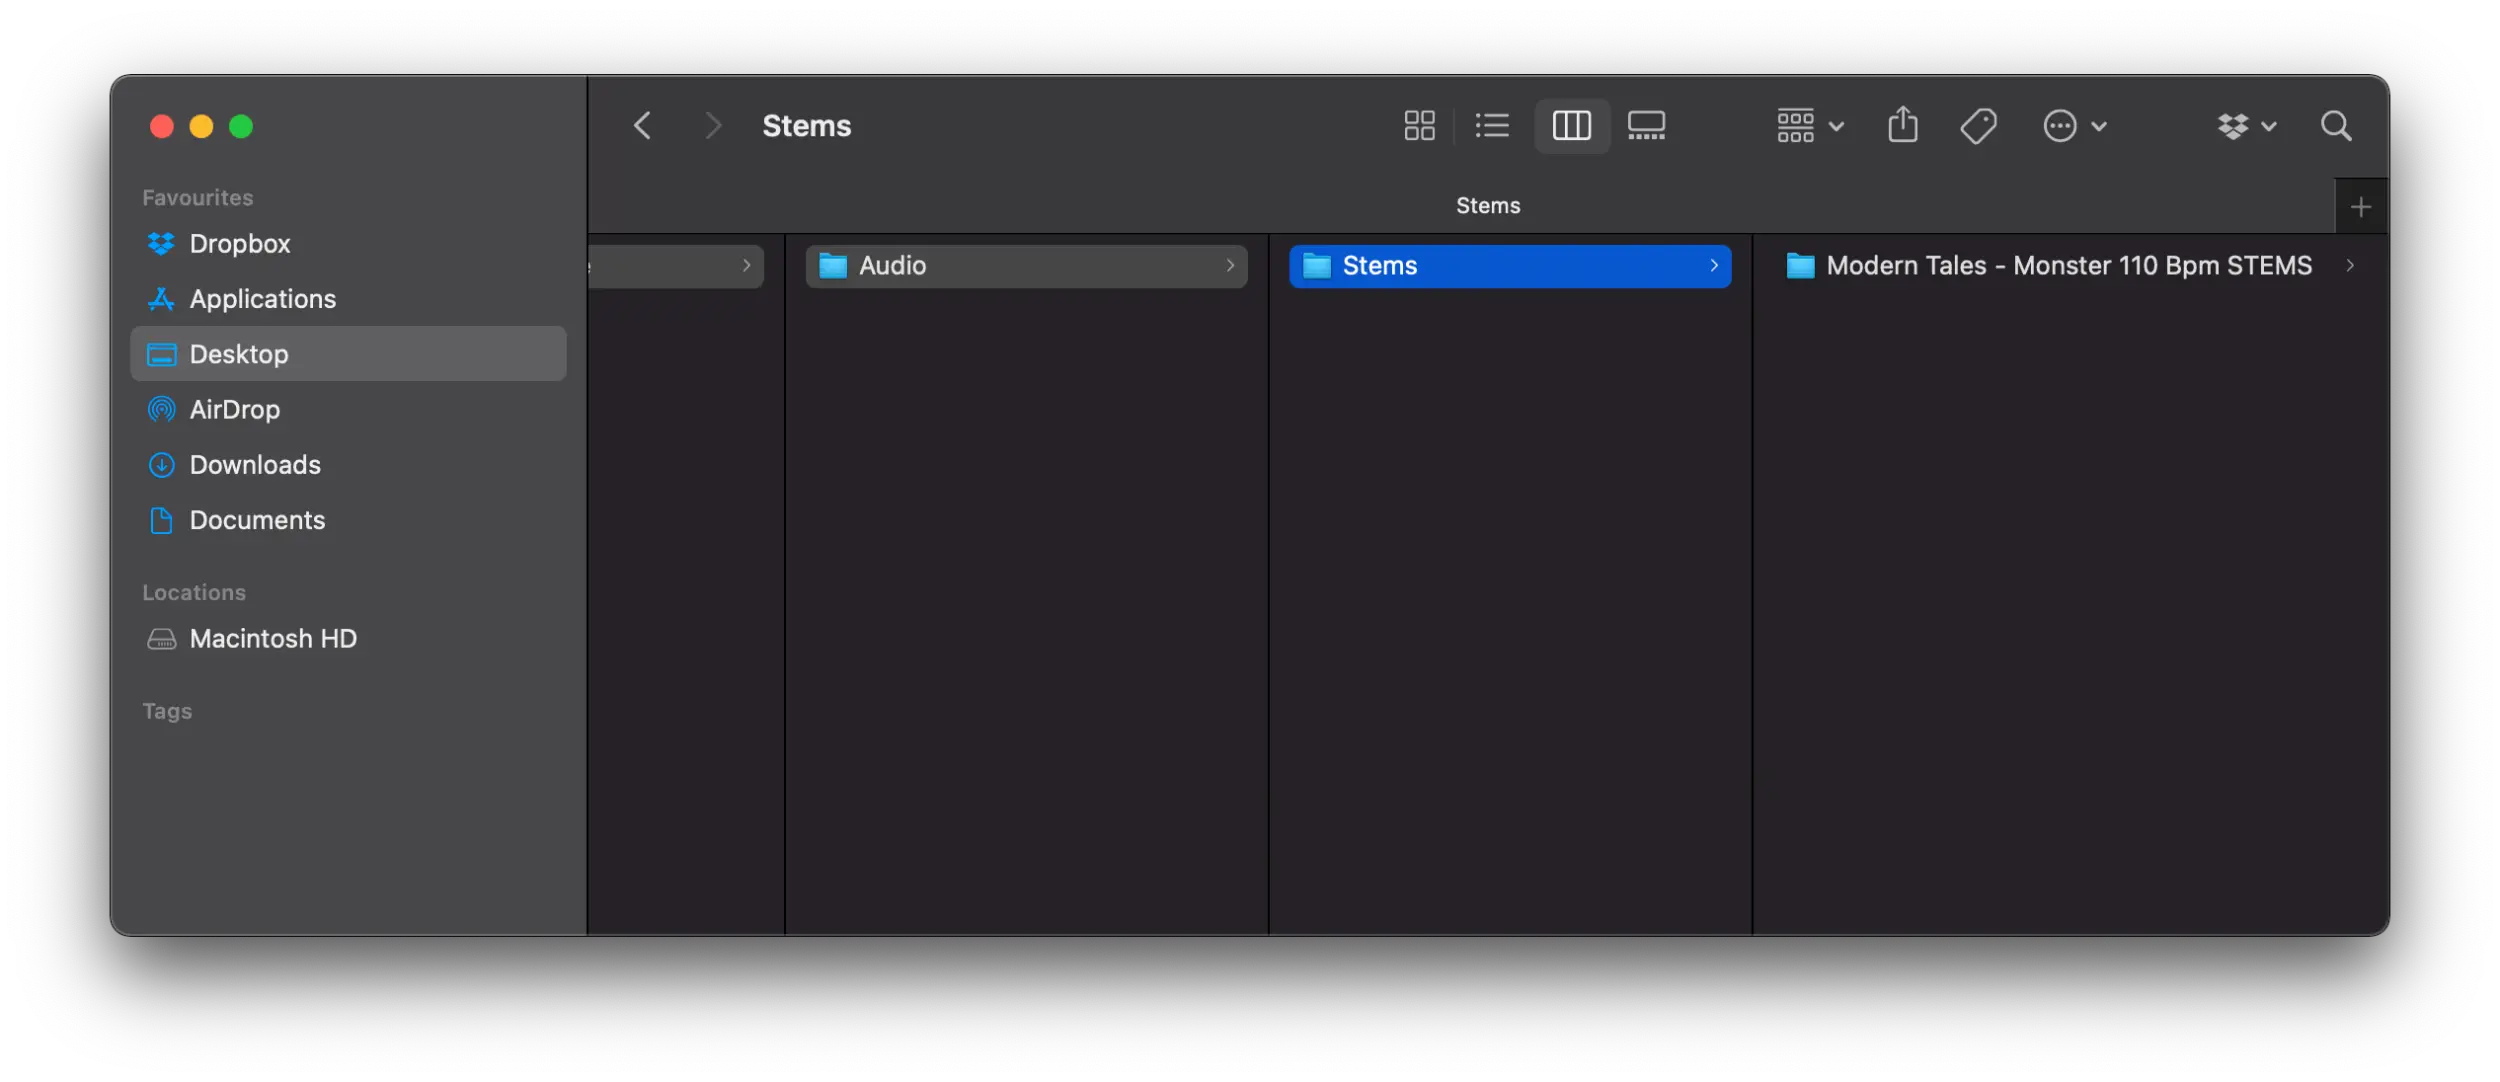
Kick.wavtoKiller Track - Kick.wavorTrack With A Very Long Name - Kick.wavtoTWAVLN - Kick.wav. - Make a folder for your stems with the track name, yes I’m writing this down here because we’ve had to ask someone to do it before. Bonus points, include the BPM & Key in the folder name to save anyone using the stems time later. Modern Tales are really good at this and it saves us a huge amount of time working on their show.
Bouncing
When bouncing out your stems you’ll have a lot of different things to think about. Ultimately we want this audio to be able to be dropped on a page in any DAW and when someone hits play, it sounds like your track. The mix is correct, the arrangement is correct, the structure is correct, the key is correct. It’s an accurate representation of the record you made in the first place.
Separation
Generally we want as much separation as possible. Whether we’re going to be running multi-track playback at this point or not, being able to create new edits using the stems is incredibly useful. It’s also going to help when figuring out what’s staying on playback against what’s going to be removed. If you only have a bounce of the full vocal bus in your stems this isn’t going to help when we want to remove the lead vocal for the singer to sing and have the stacked BVs on playback.
If you have access to all the individual parts these grouping decisions can be made later. You’ll also find it much easier to make samplers from these stems for your players.
Sample Rates
There’s some flexibility here so long as you’re consistent. The consistency is probably more important depending on the DAW you’re running your playback sessions in and your soundcard. If it’s Ableton you won’t hear any issues, Logic and you might start to hear it if you’re clocking to a different sample rate to what your audio is at. If you’re running a PlayAUDIO12 as your audio interface it’ll be locked to 44.1kHz so running anything above this is fairly pointless.
Choosing 1 sample rate and sticking to it across the board is the best rule of thumb. 48kHz and 44.1kHz are both good options as they’re supported by most devices and will be kinder on your CPU if you’re using a laptop. It’s not uncommon for us to receive source stems as 44.1kHz 24-bit WAVE files and work from there. If you’re bouncing lower than this you’re likely going to be downsampling enough from your source audio to start creating audible problems.
Dithering
People always ask what the ‘best’ dithering setting for them to use is. Literally every time. The fact is, in the context of what we’re doing, No Dithering is best. We’ll be replaying these stems at their native bit depth and will not change that. Dithering only becomes relevant when we’re reducing this bit depth and need to account for digital noise created by this. iZotope do a really good job of explaining what it is and when you need it in this video.
File Types
A less common conversation that we have but also relevant to mention while we’re on the topic of bouncing. Should you use .aif, .wav, .ogg? Definitely do not make a folder of .mp3 files. Generally WAVE or .wav files are your most cross platform and widely adopted audio files. It’s almost impossible to find some software or gear that can’t use WAVE files.
How AWIP Approach It
Generally with shows we see stems using the following workflow.
Source material(From Artist)
|
|> AWIP Programming Session
    |
    |> AWIP Stem Folder
So once we’ve received stems from the Artist we’ll load them in to a ‘Programming Session’. This is basically a project file where we will listen through every stem and start to group them by a common general group structure. Something like this…
- Drums
- Music
- Bass
- Vox
There’ll be sub-groups within these but when you’re looking at most outputs from playback interfaces you’re most likely to split like this. This can change depending on the type of show but as a broad stroke this will cover most music. This process is also an essential part of us learning the music and all the details within it.
That programming session will start to look like this.
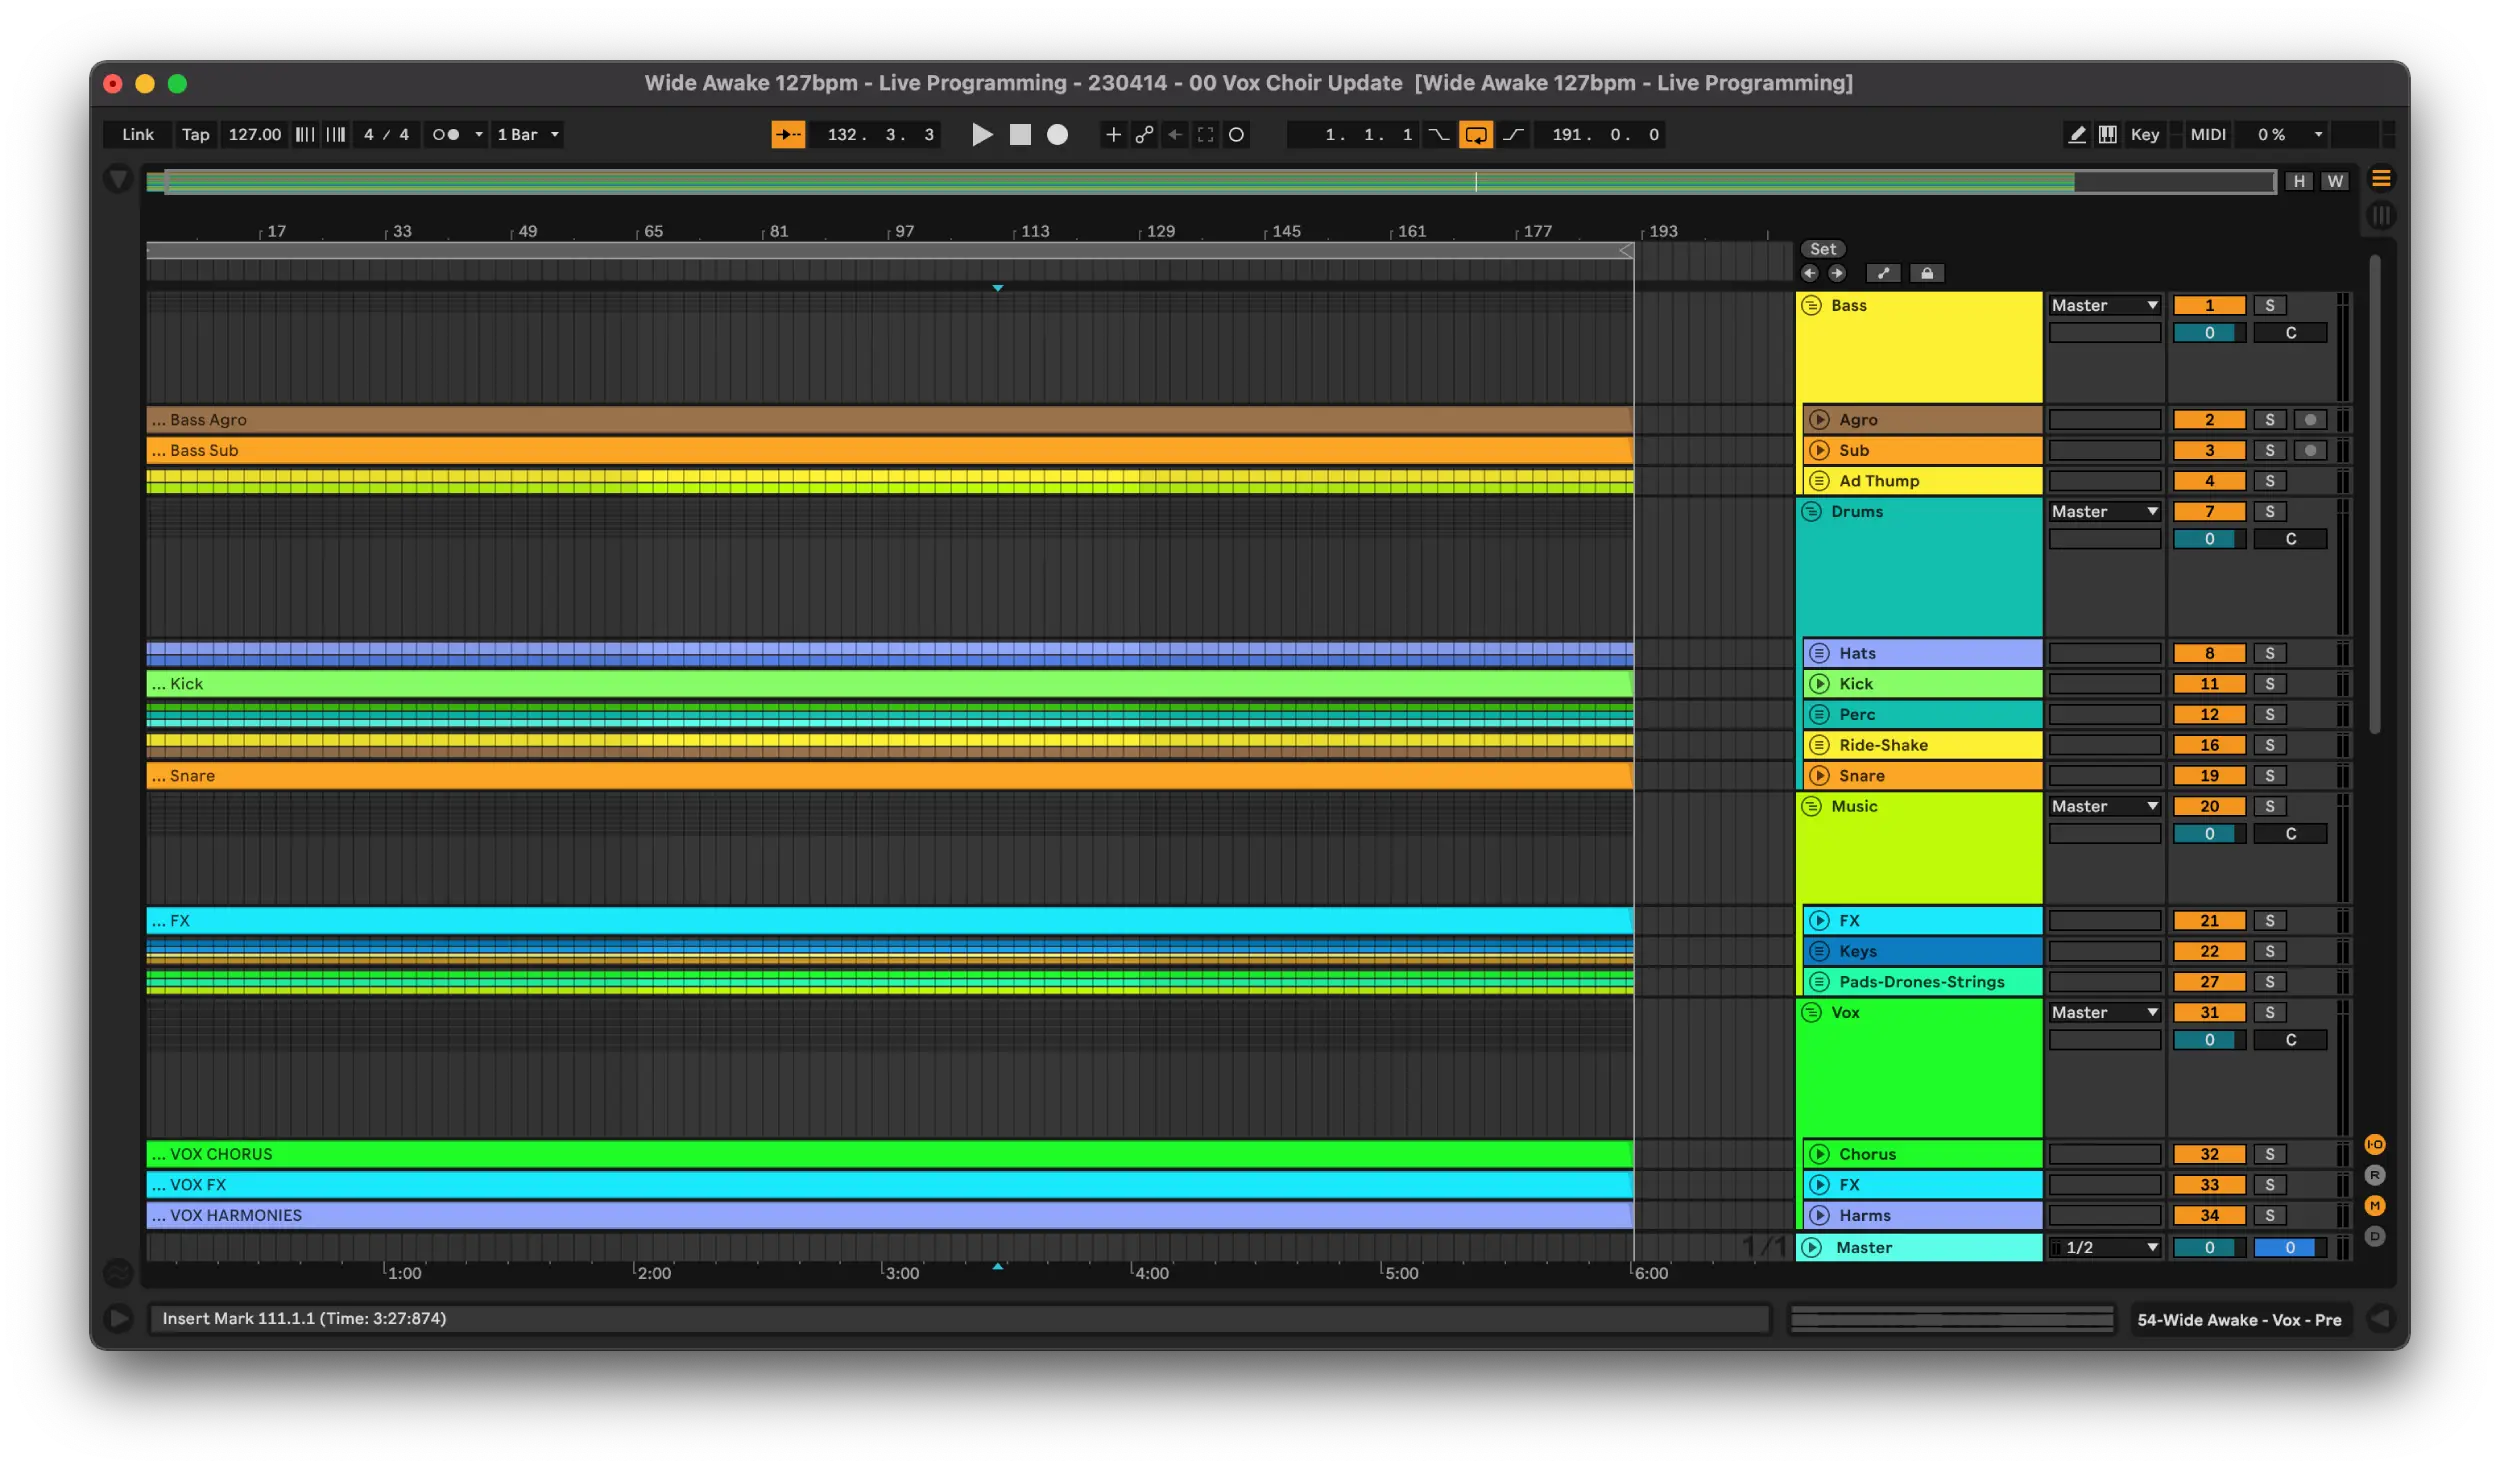
You can see that within these groups we have started to create sub-groups to appropriately fit the source material. When we start bouncing these out we’ll then slim down the number of audio files that need to go in the final Ableton session that’s used on the show.
Once we’re done with these groups we’ll start bouncing these stems for the show. The rules for this are defined by the Bouncing section above. We’ll then generally use the following syntax for the file names:
[Song Name] - [Main Group] - [Stem Name].wav
As an example here’s a stem name using this system from the Modern Tales – Wide Awake AWIP Stems…
Wide Awake - Drums - Perc.wav
When you have a series of file names like this you’ll find that when you drop all of them on an empty session they immediately fall in to their main groups.
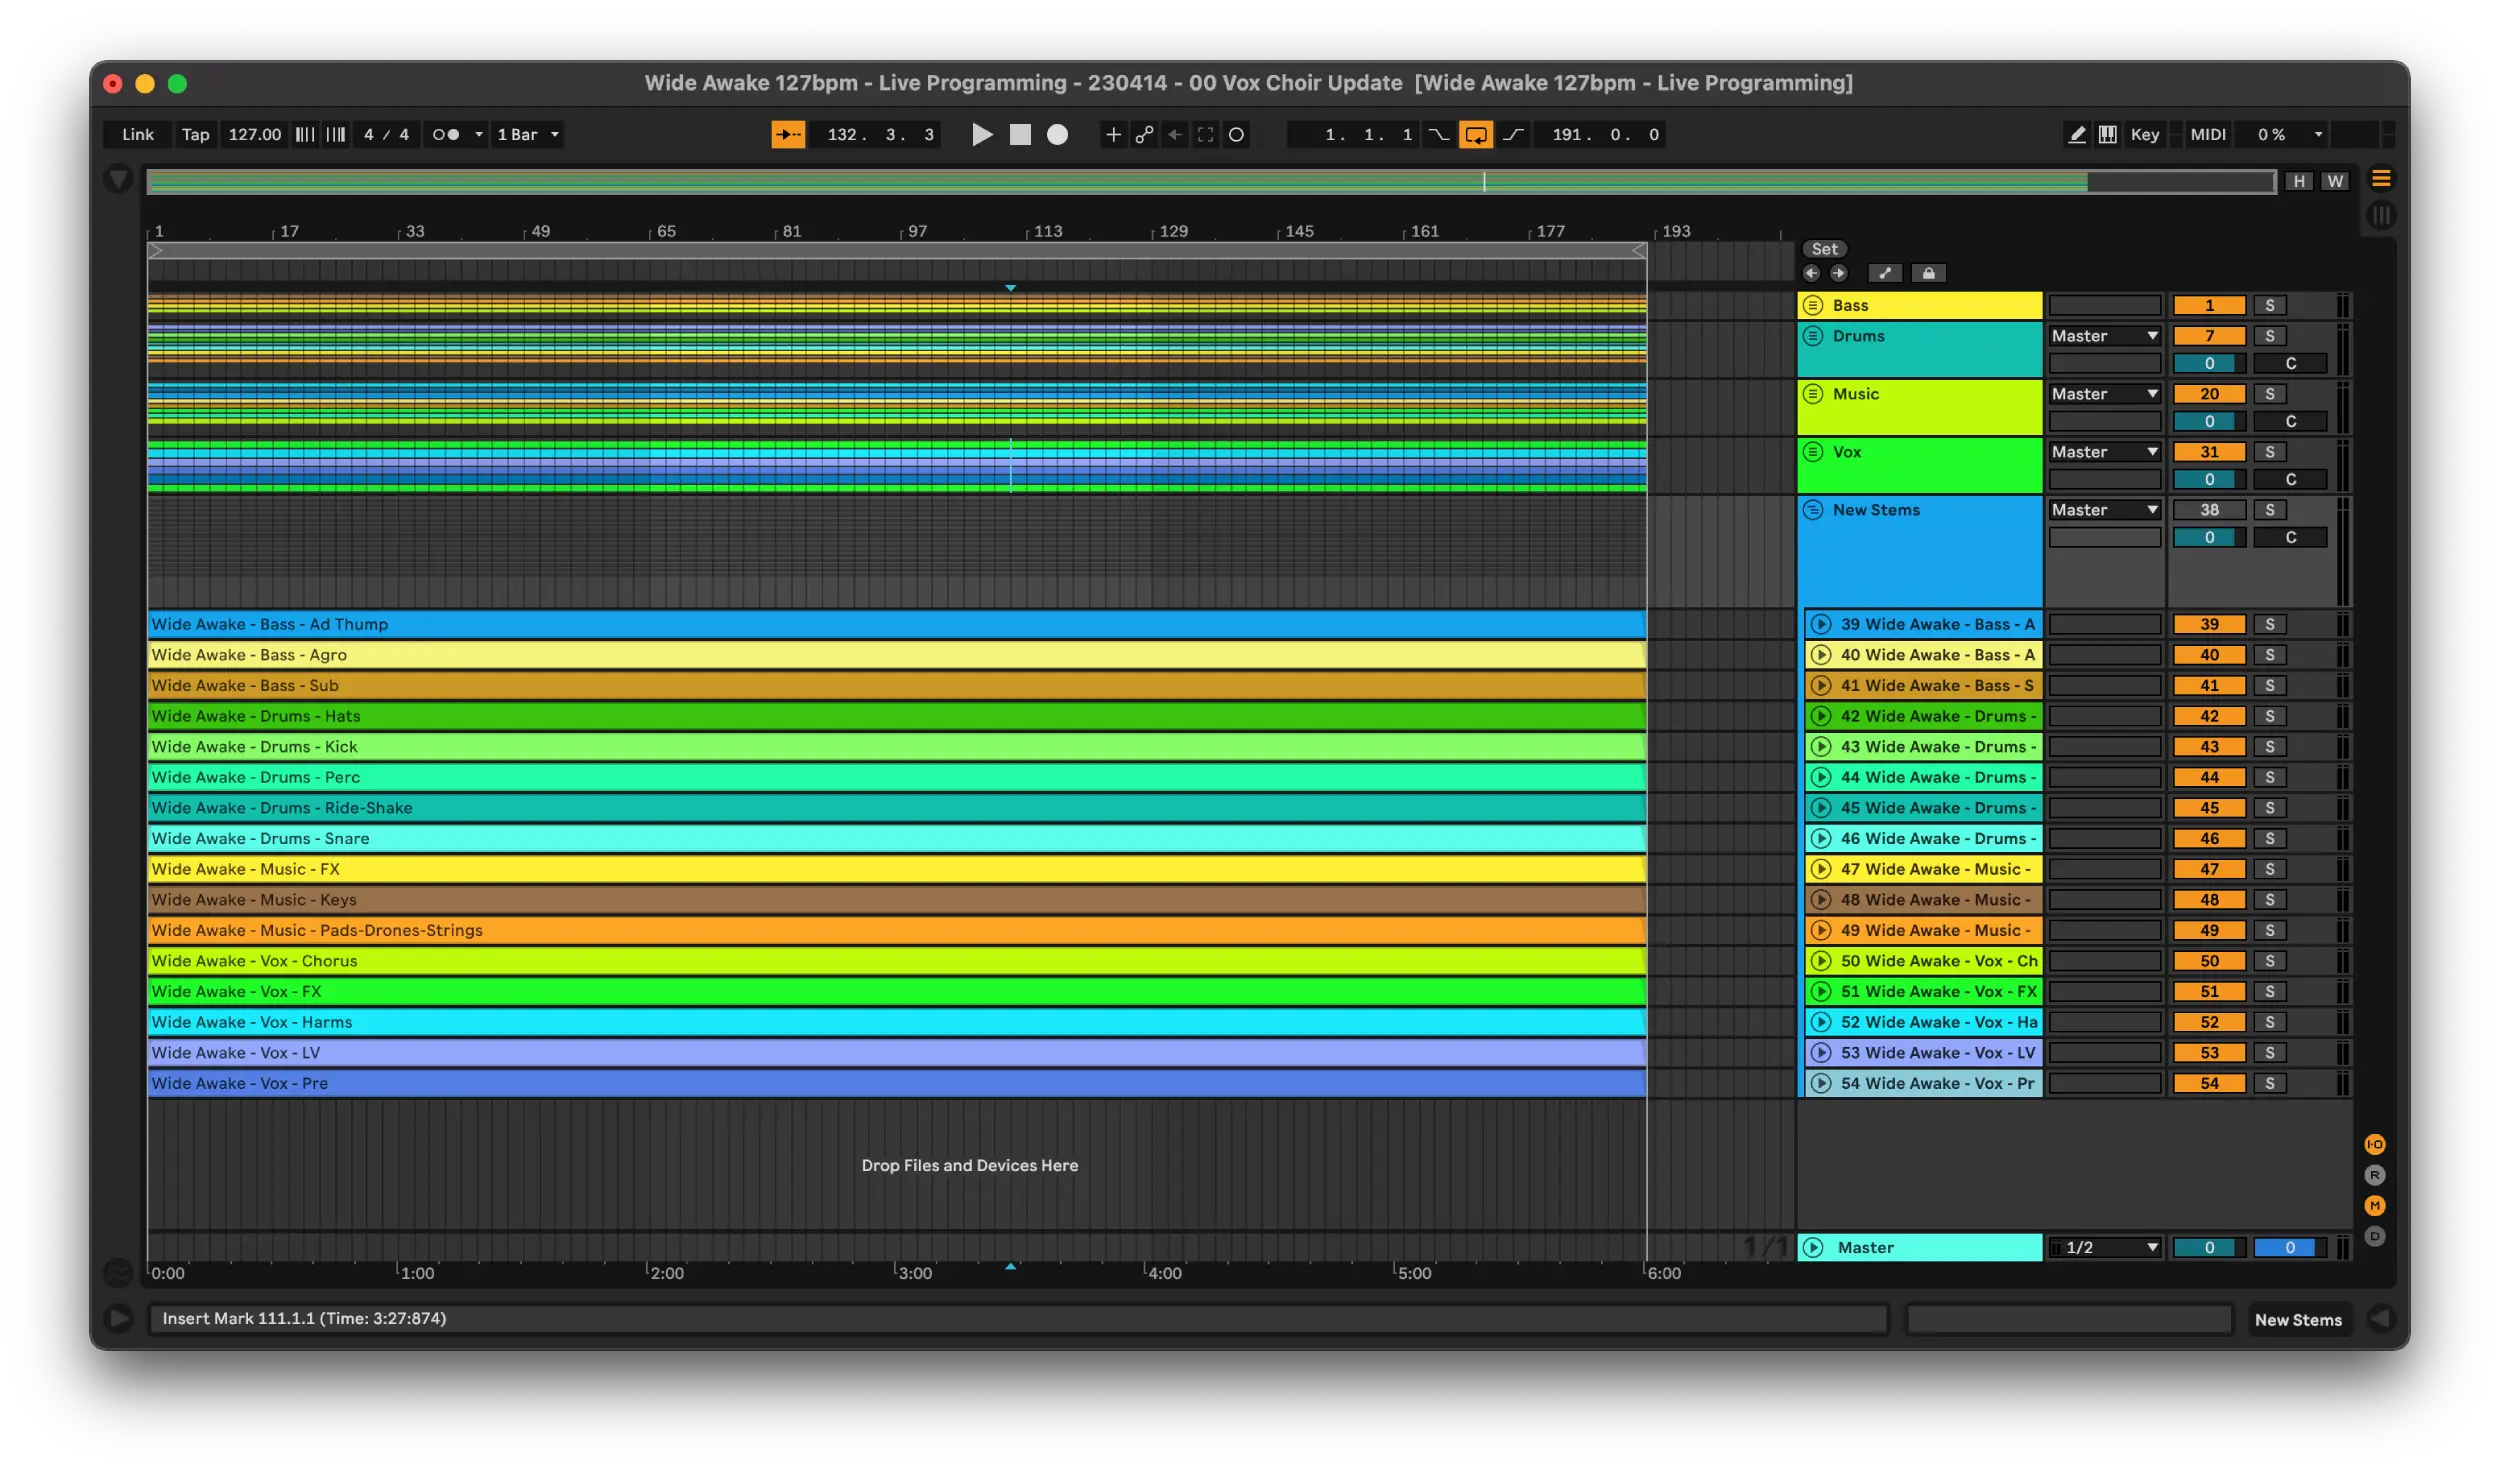
Down the line this becomes super handy when adding a new song to an existing session. It’s quick and easy to find the audio you need and pop it in the groups in the show file which will route the stems to the correct playback outputs.
Keeping these audio files consistent will also greatly help changes and switching parts out. Most DAWs access audio via a static file path and won’t question it if the audio file name is the same. For example if the sub bass for Wide Awake is always at…
~/User/Playback/Modern Tales Live/Audio/Stems/AWIP Stems/Wide Awake 127bpm/Wide Awake - Bass - Sub.wav
Then whatever is contained in this audio file will be played back in the Ableton session that’s pointed to it. If I rebounce this file with the LV part in it then we’ll end up with LV coming down the bass bus. This is unlikely to be a real world scenario but something common is a new snare in the snare group or a BV layer was missing that needs to be added. I’d recommend trying this out with your own sessions. Break some stems, fix them, break them again and understand how DAWs link to the audio files in them.
Lightning Fast Stem Bouncing
Maybe not quite lightning fast but once you’ve setup a stem programming session as we have above it becomes super quick to run off stems.
You’ll notice in the previous screenshots the loop braces have been set to the length we want our stems to be. This means we can quickly select the appropriate region to bounce the stems and ensure they have the correct length and start point every time. The next trick is to use the ‘Selected Tracks Only’ function in the bounce settings in Ableton.
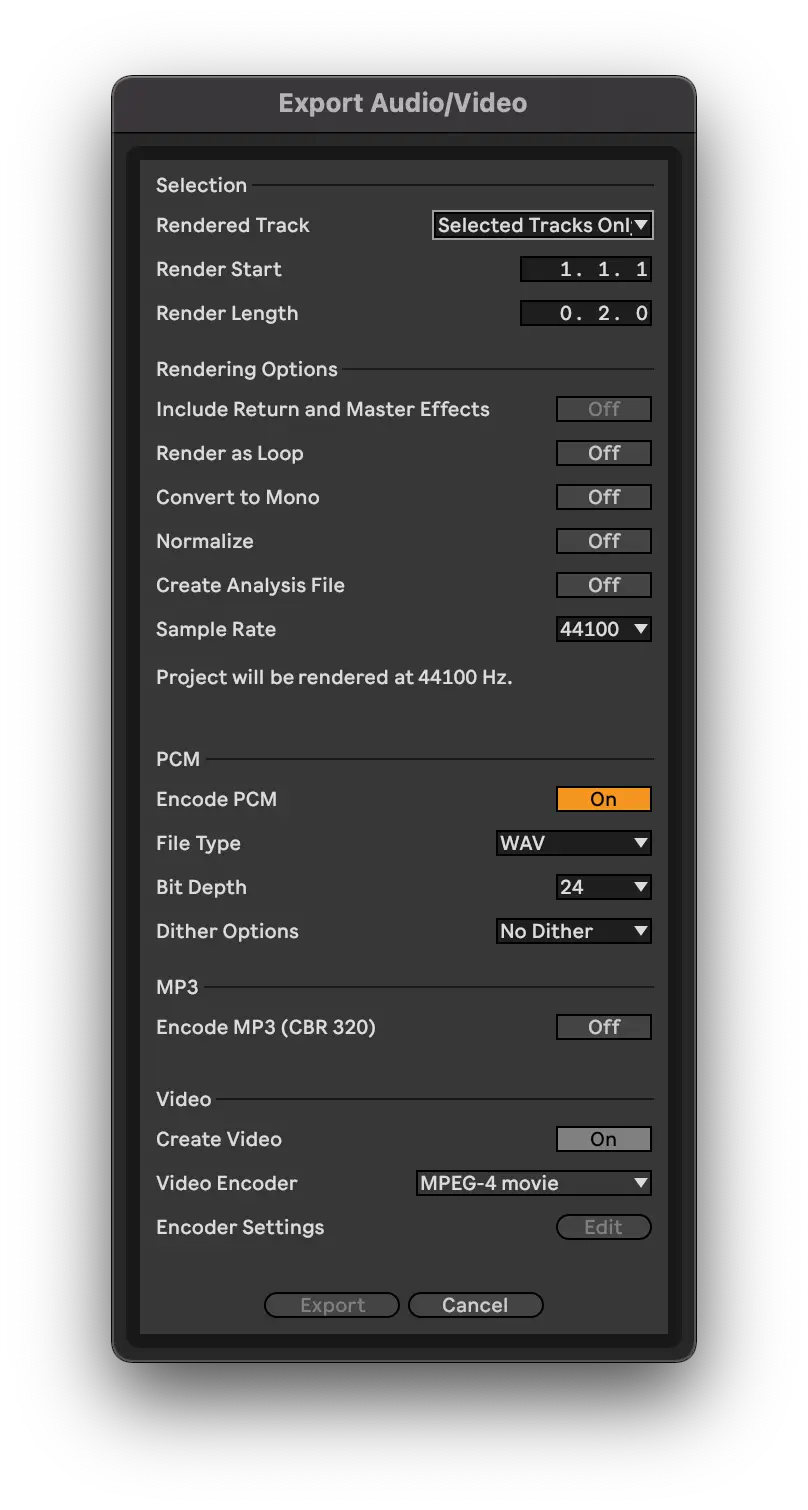
If we have selected all the channels in the group we wish to use then Ableton will append the channel’s name to the new audio file. If you’ve organised your parts well this makes these bounces incredibly fast. An example using our previous syntax…
We set the file name to Wide Awake - Music -.wav which will yield the following when bouncing using ‘Selected Tracks Only’…
Wide Awake - Music - FX.wav
Wide Awake - Music - Keys.wav
Wide Awake - Music - Pads-Drones-Strings.wav
Note that Ableton will add a space before the channel name when appending it to the final file name. Account for this in your naming before you bounce. Once you then do this for your Drums, Vox and Bass groups you’ll have a very clear collection of audio which is ready to go straight away on your playback file.
From here all we are left to do is make sure each track is organised in it’s own folder in a wider stems folder that our show file can point to. This will become our go to for all show ready audio. It’s worth keeping your BPM and Key information in these folder names just so it’s always quick and easy to communicate this info across your team.
Always remember the stems are the foundation of modern electronic and pop shows so it’s incredibly important to get them right. We pay a huge amount of attention to detail in stem management to ensure that everything we are hearing when we get to rehearsals is correct. Good stems underpin setting a unity gain for your playback which will often be the unity gain for your FOH mix. Get your source consistent and your show will sound as good as it can.
If you have any questions, comments or requests for our blog feel free to contact us on insta or via email!
@aworkinprogress.uk
contact[at]aworkinprogress.uk